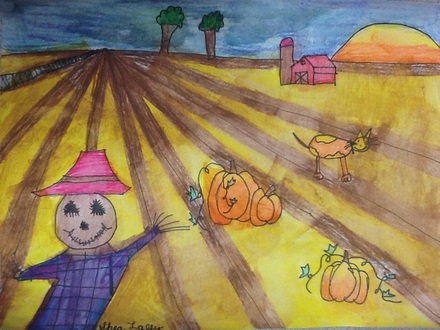
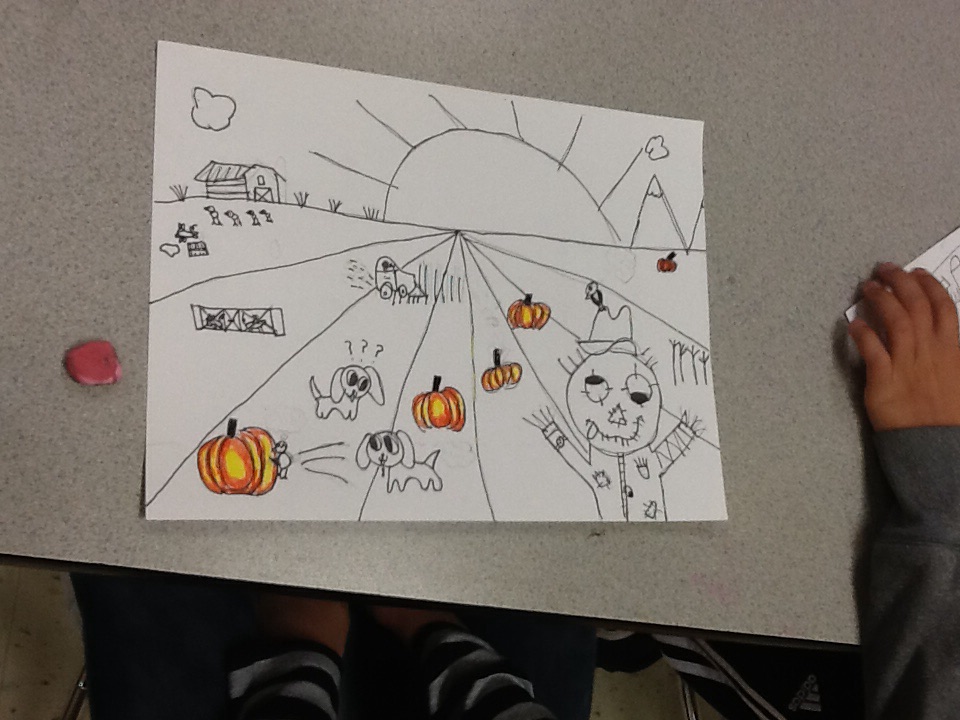
 In 3rd grade, we recently finished up a landscape project. Our focus was to create the illusion of deep space in our picture. We discussed how object size and location on the paper helps to create this illusion. We also learned the terms used to describe the different locations in a landscape; foreground, middle ground, and background.  The students were required to draw a barn in the background and a scarecrow in the foreground. They could include other objects to make their farm landscape interesting and unique.
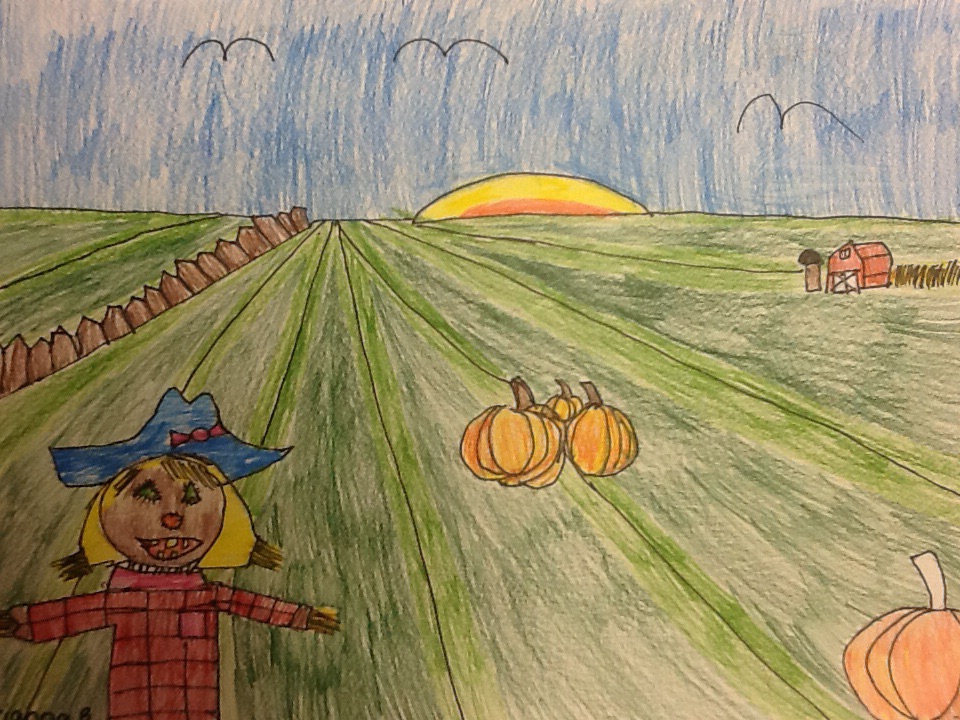 We also practiced using a vanishing point with converging lines to accentuate the depth of space. This was a project with a lot of opportunity for creative solutions and details, while practicing drawing skills.
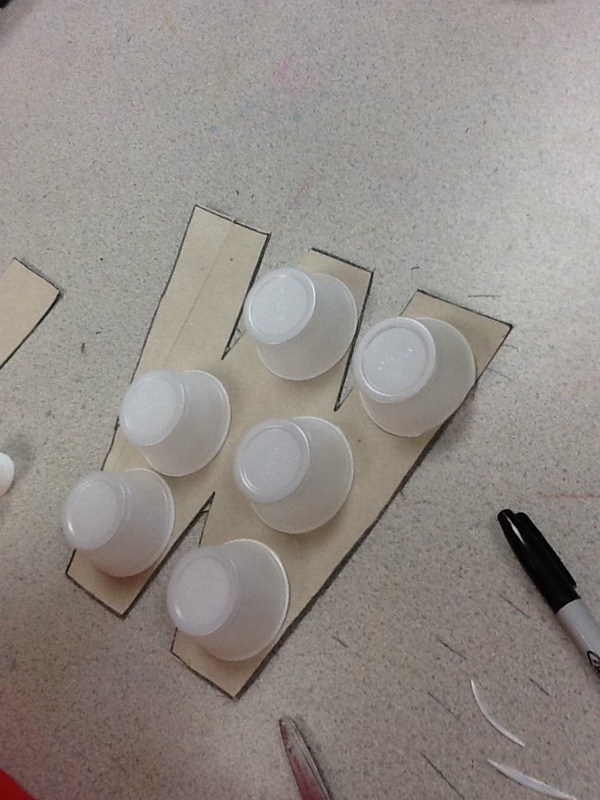
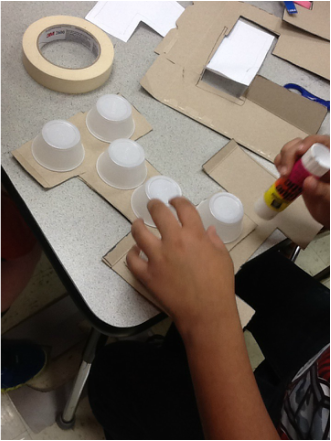
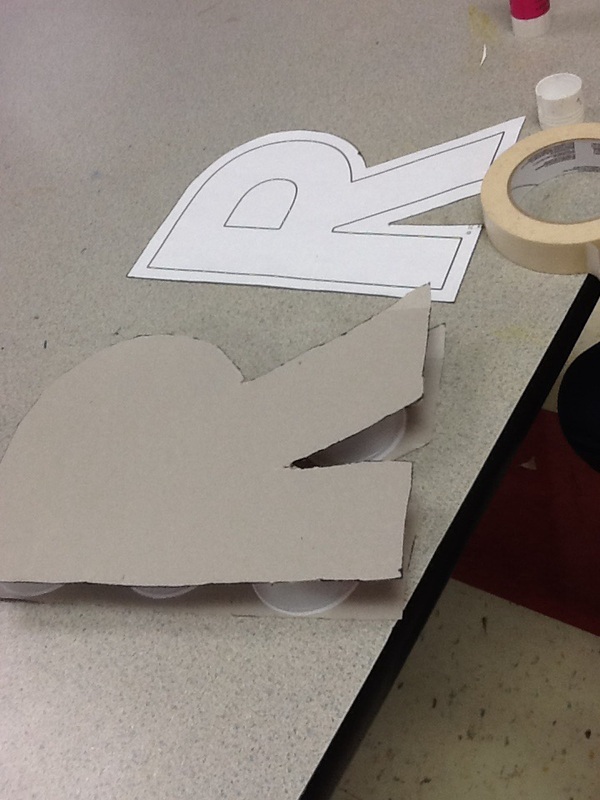
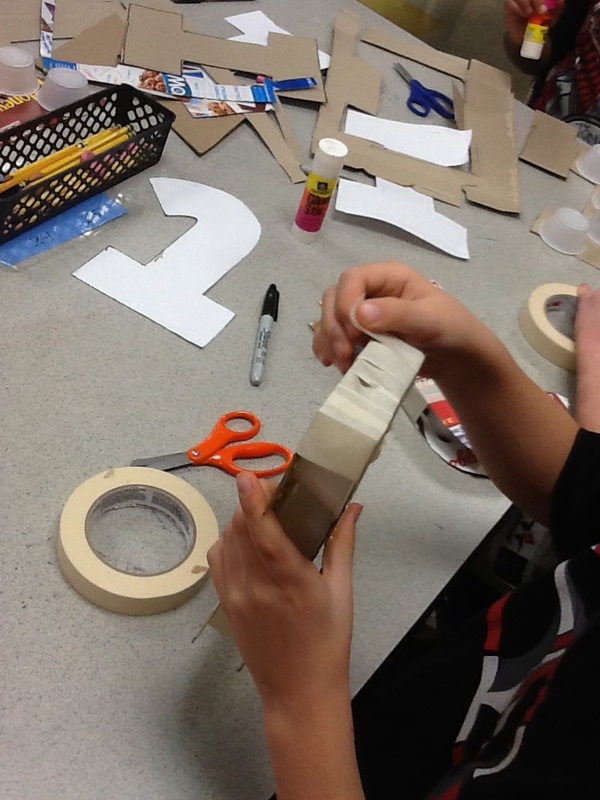
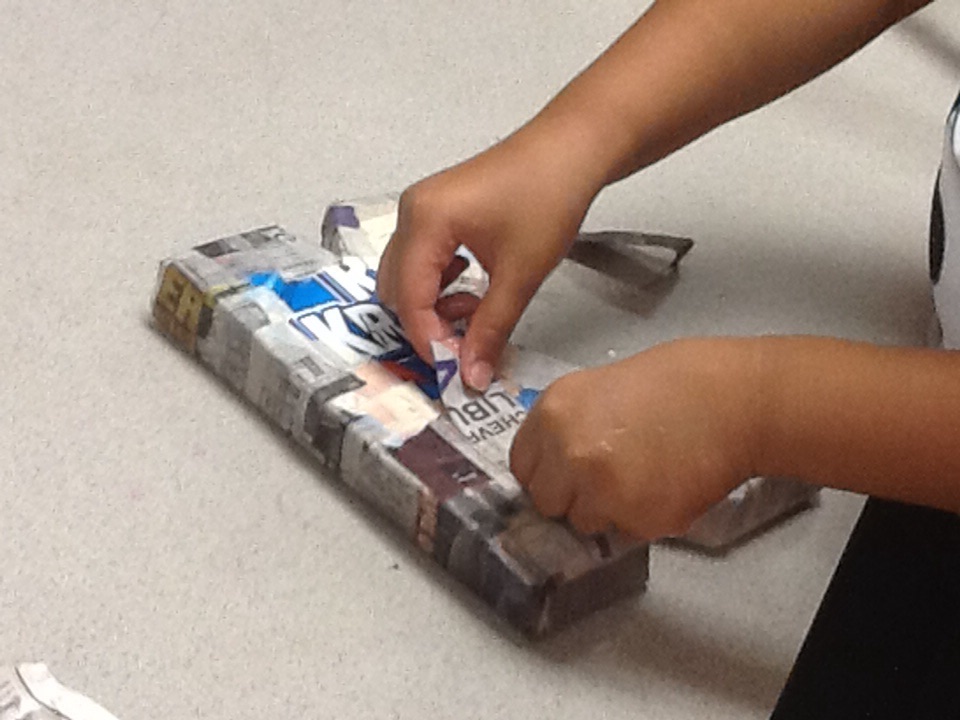
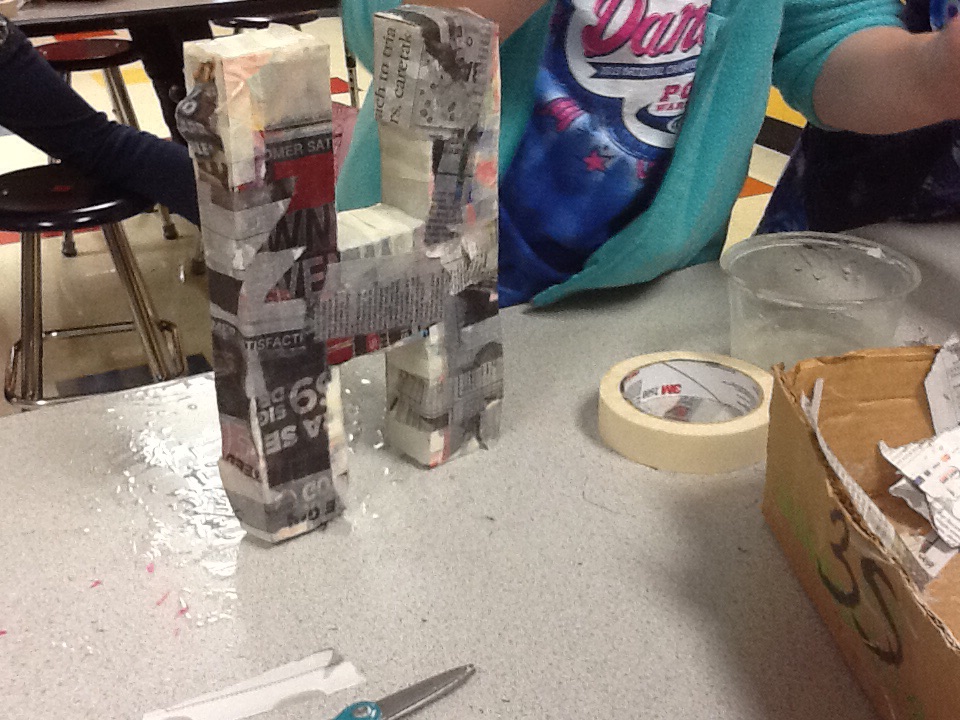
4th graders have been busy the past three weeks with a paper mache project. They are making a large, three dimensional letter. They chose to represent either their first or last name. Each student brought in a cereal box to use as the base for this project. We began by tracing a letter pattern onto the cereal box cardboard twice and then cut the letters out. To create the width of this three dimensional letter, we glued small plastic cups to one side of the letter and then glued the other letter on top.
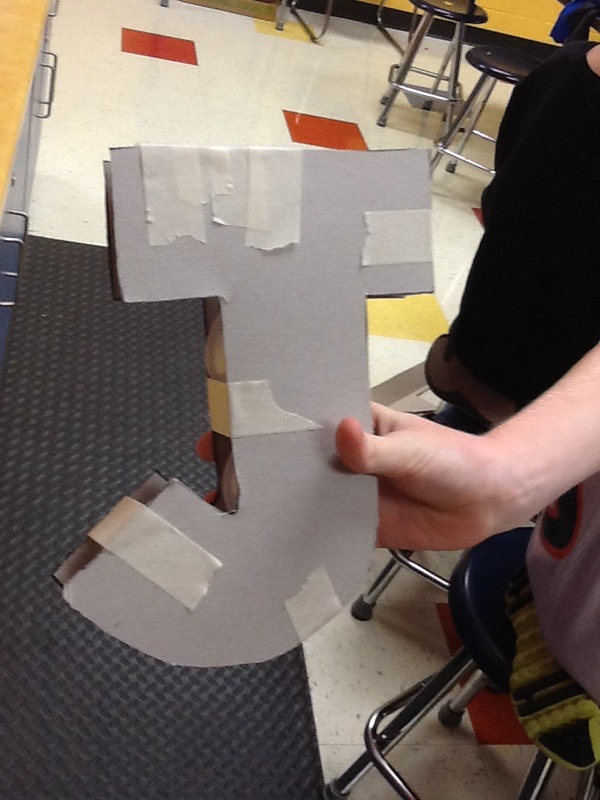
Next, the students added masking tape around the edges of the letter to add strength and keep the structure together, preparing it for paper mache.
Last week, many classes began the paper mache process and added a layer of newspaper pieces covered in paste. The paste we use is School Smart Art Paste and it is awesome. I can mix up a 4 gallon batch with one box of this stuff. It's non-toxic and easy to store so I can use it for weeks at a time. Most of the students loved dipping their fingers into the ooey-gooey paste. However, there were a couple that were repulsed by it.
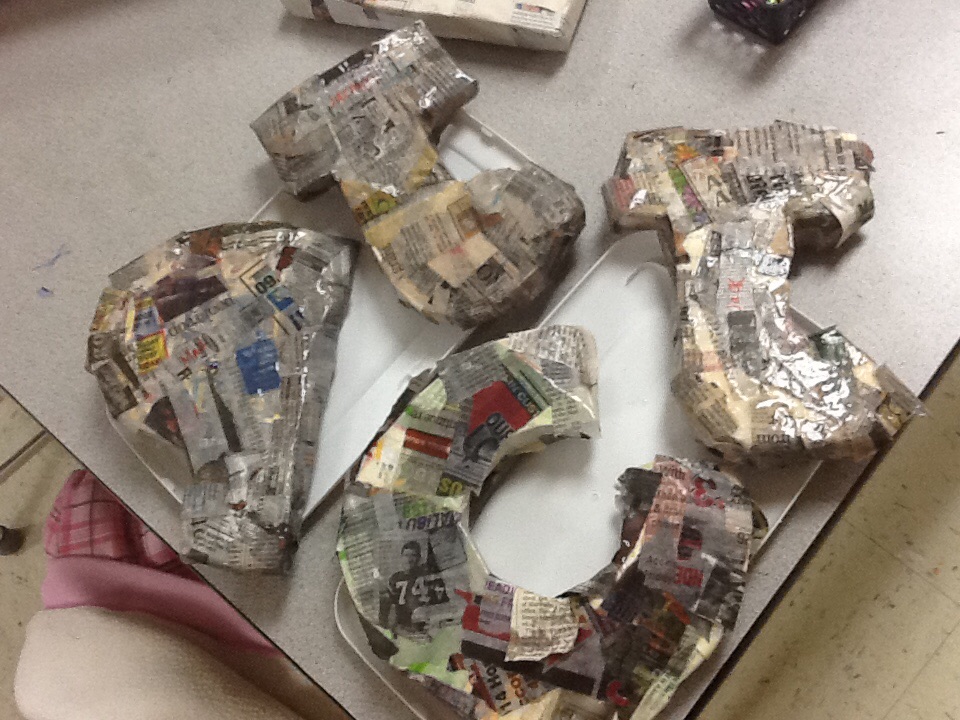
This week, we began to add our last layer, using white paper towel to cover the print on the newspaper. Hopefully, this step will help us avoid having to put layers and layers of paint on the letter to cover the print. 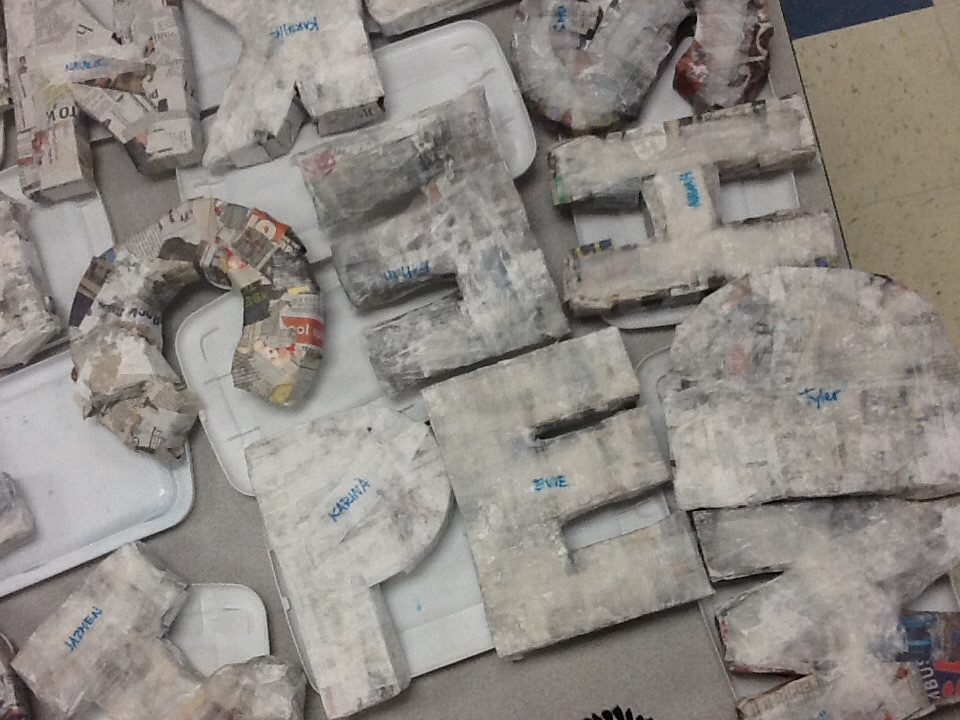
I really like how this project is turning out. So many students really got a hang of the process and were able to create a nice, smooth and even surface with the paper mache. It's not as easy as it looks! Great job 4th grade! We have one more week of paper mache and then we will begin to plan how to paint our letters.
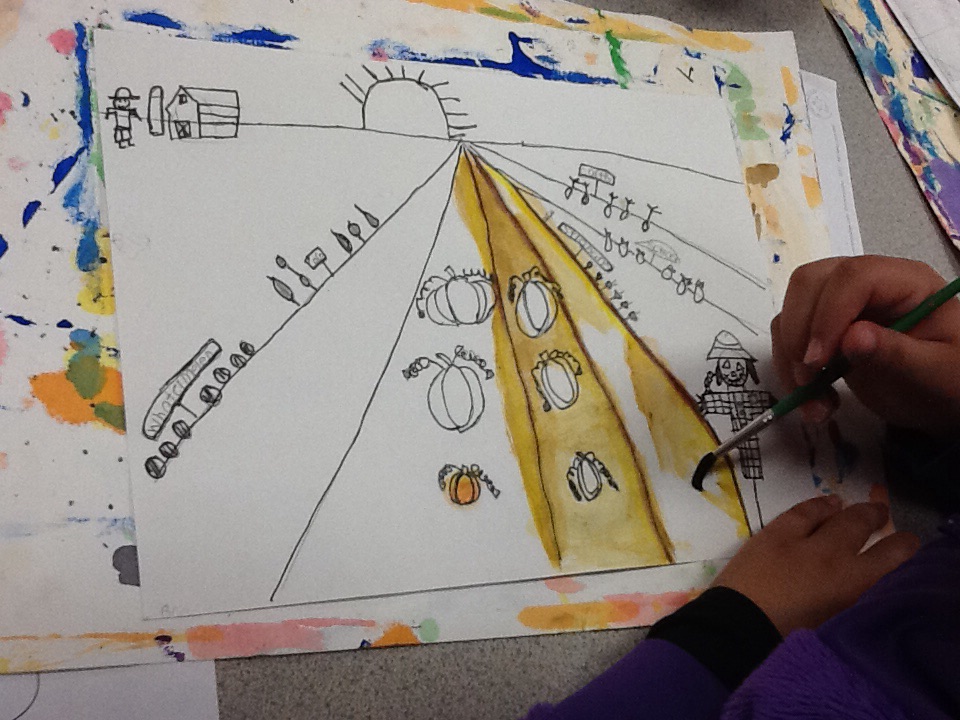
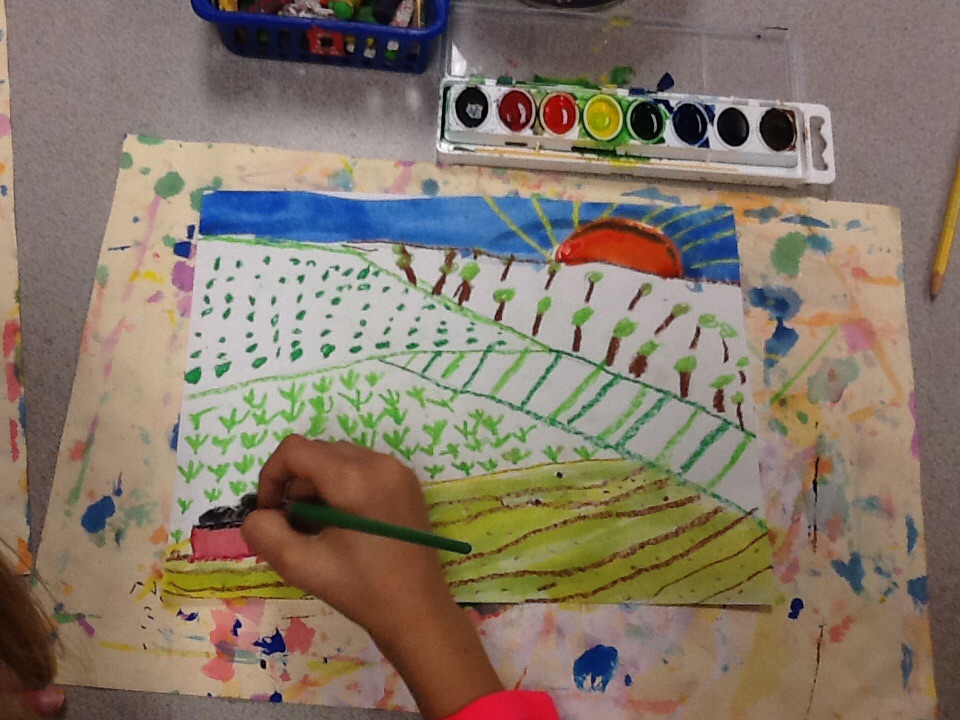
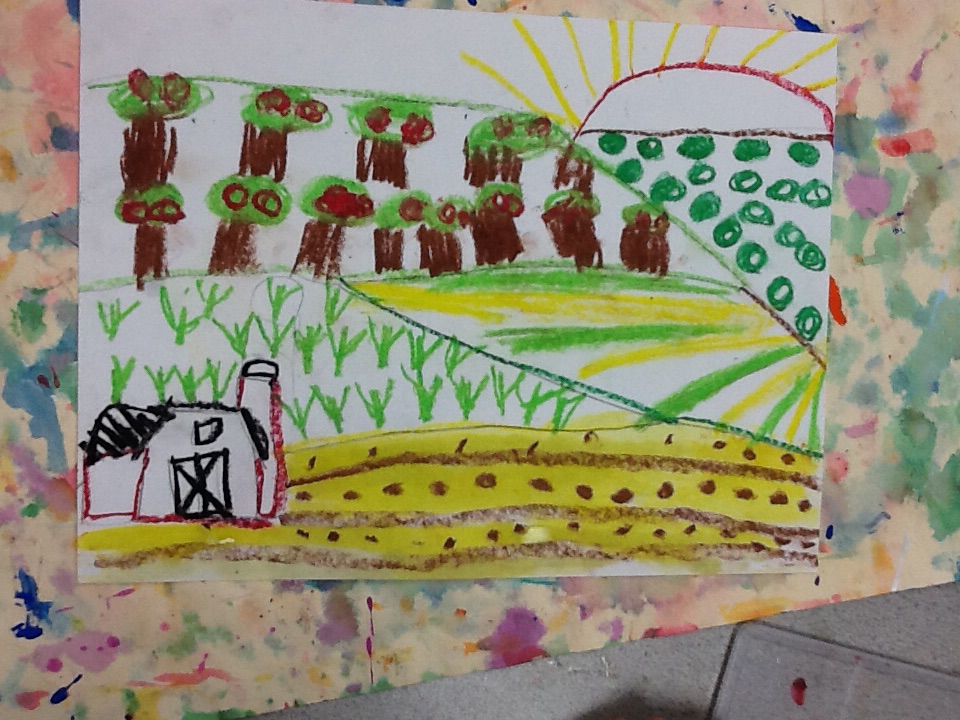
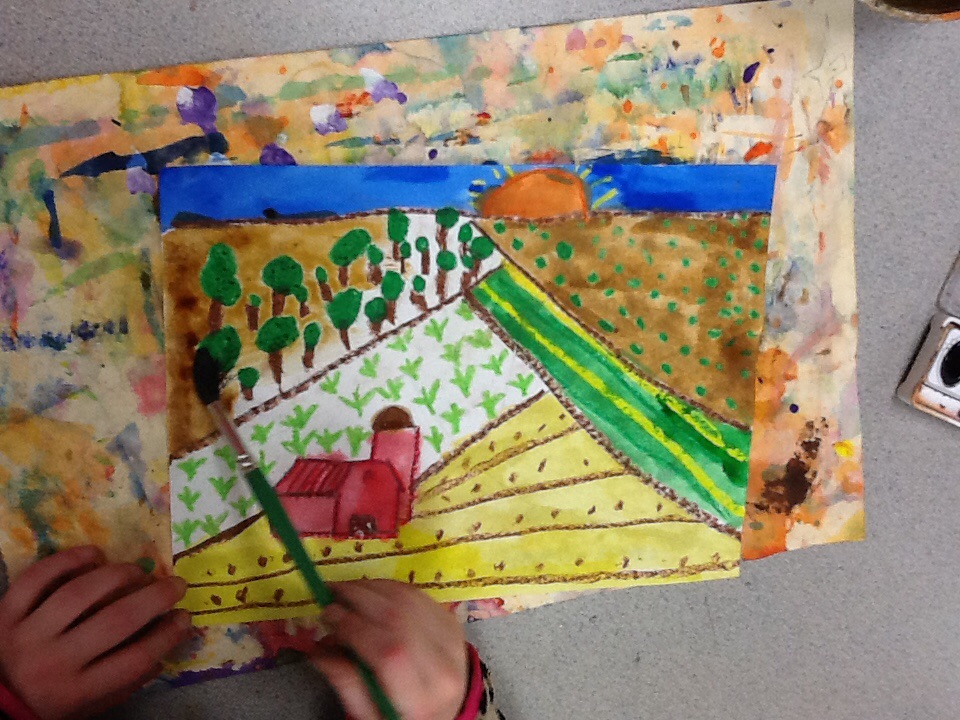
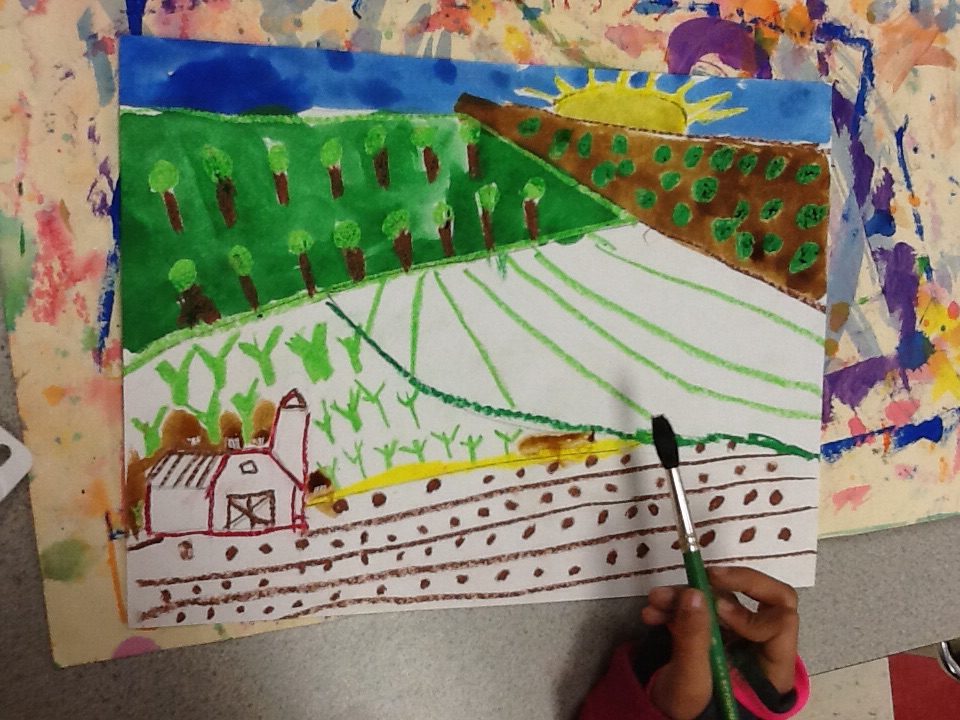
In second grade we have been discussing the artist, Grant Wood. We looked at many of Wood's landscape paintings and determined that a landscape is a picture of the outdoors. Wood paints the farmland that he grew up around in Iowa. The open fields that he paints contains many different textures. We discussed how he creates these textures by using repetition and pattern. 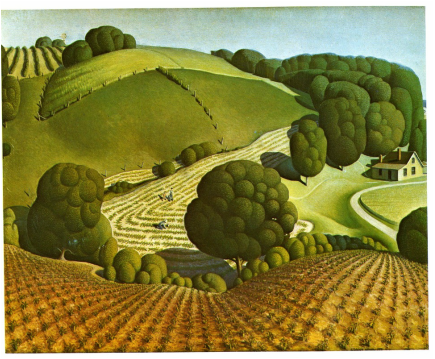 As we began our own farm landscapes, we focused on using pattern to create different textures in our fields. We wanted the land to be large and fill our paper so we drew our horizon line (where the sky and the ground touch) close to the top of the paper.
First, we started with pencil and the students followed along with me as I drew a barn. Then we drew our horizon line and divided up the land into different fields. We traced everything and drew in our textures with oil pastel. The last step of our project was to paint over everything with watercolors.
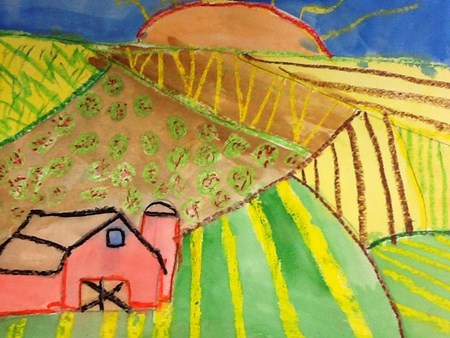 These paintings turned out beautiful. You can see more of the finished products on our Artsonia Gallery. Next, we will look at Grant Wood's very famous portrait, American Gothic.
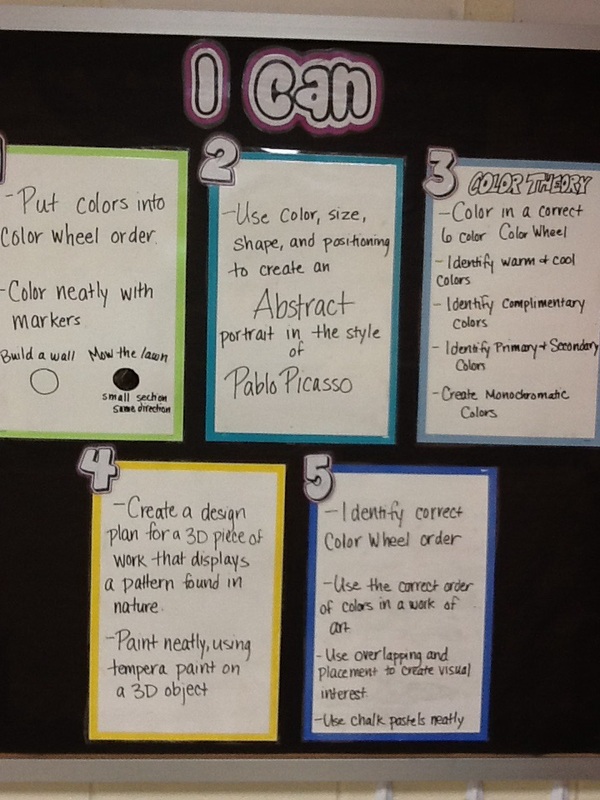
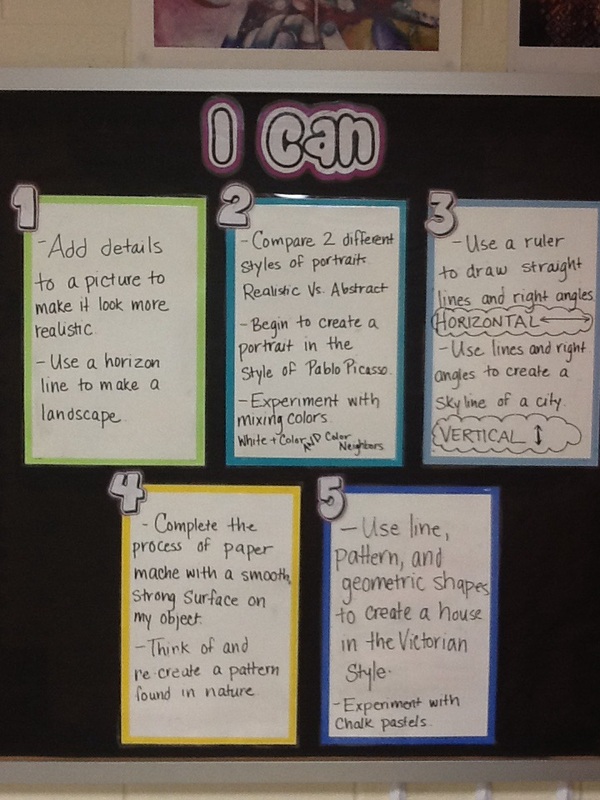
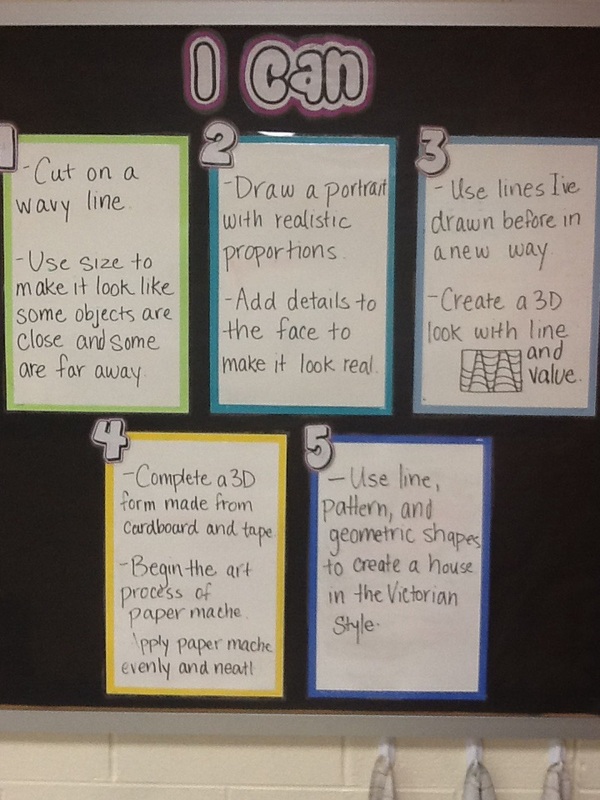
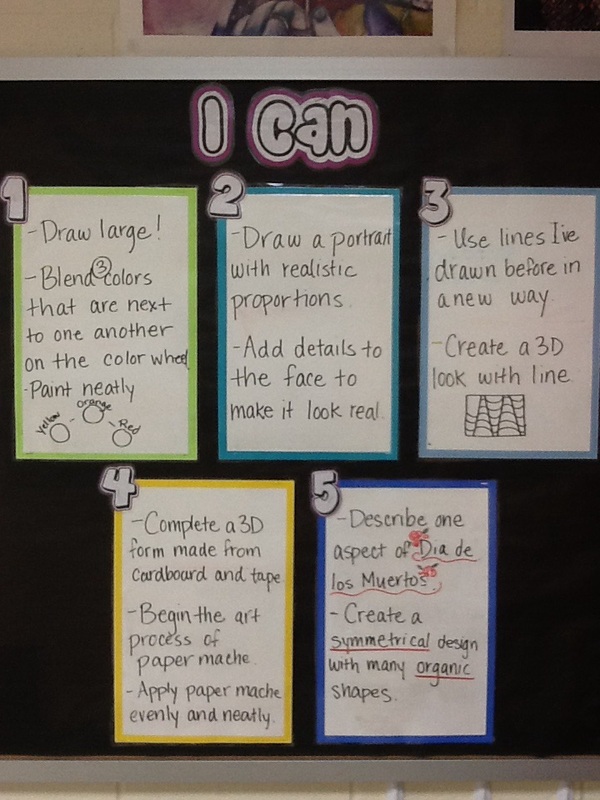
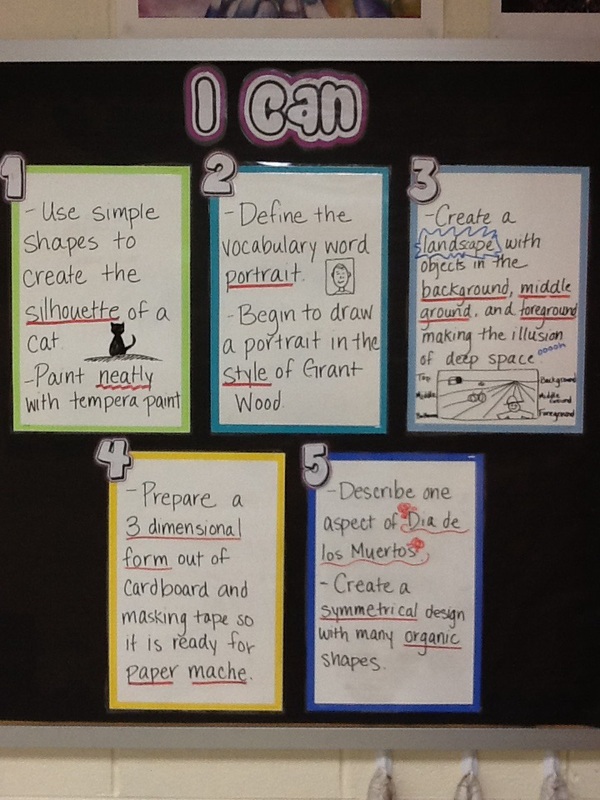 This is my "I Can" board. On this board I write statements that help students understand what the objective, or focus will be for the day. I tell the students, after our lesson and practice throughout class time they can do these things now. I hope that this helps to narrow my students' focus and help them understand what skills and knowledge I am trying to teach them. Each week I will post a photo of the "I Can" board so you can see what we are working on as well. 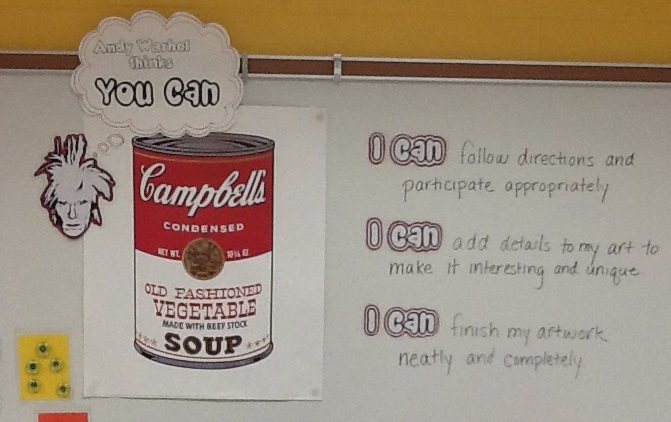 I also have these "I Can" statements posted at the back of my room. These never change. I expect that every time students come to art class they can demonstrate these statements.
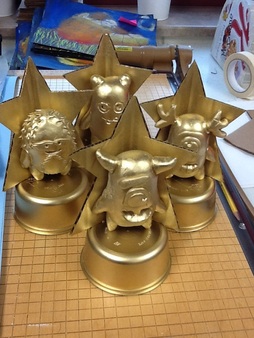 Our Dojo Trophies At the beginning of September I implemented a new classroom management tool for all of my classes called Class Dojo. Class Dojo is a flexible online classroom management system that teachers can setup and implement with their particular classroom needs. This is how my art room uses Class Dojo:
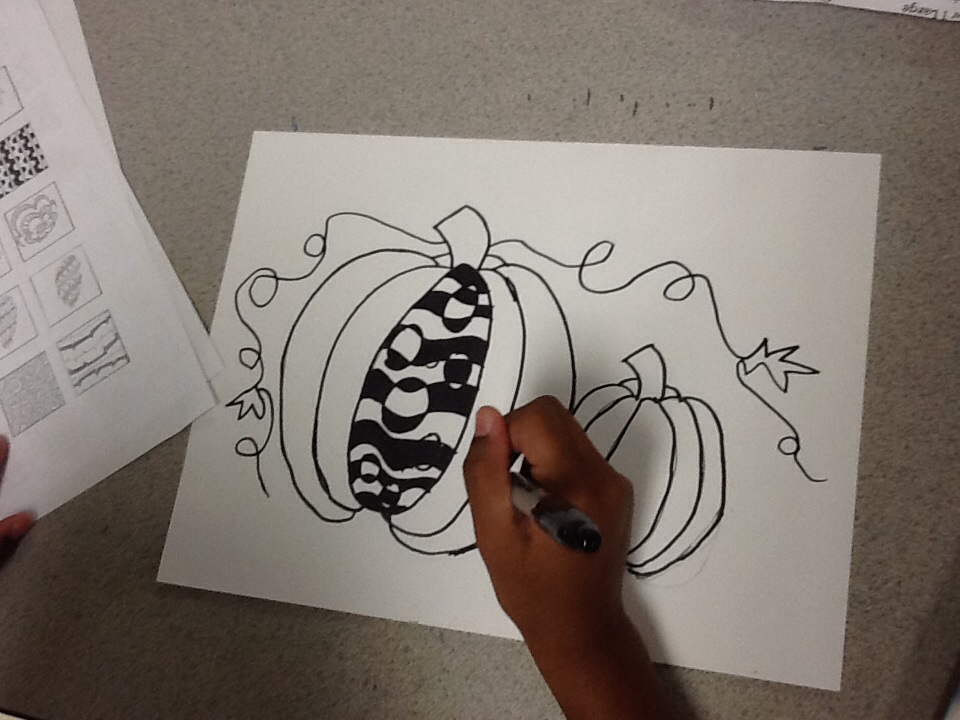
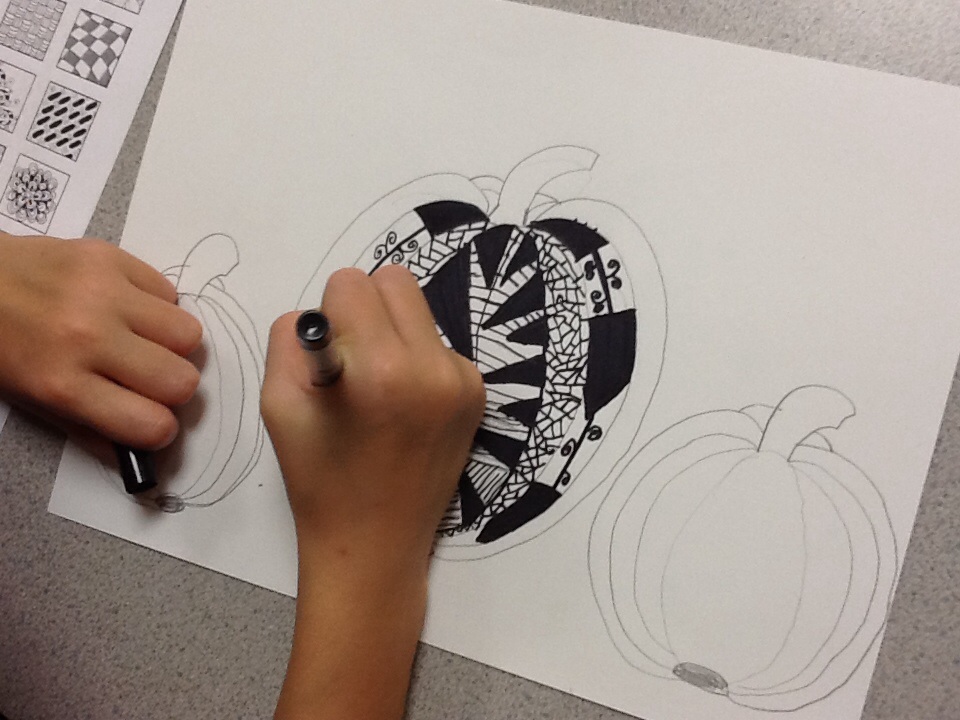
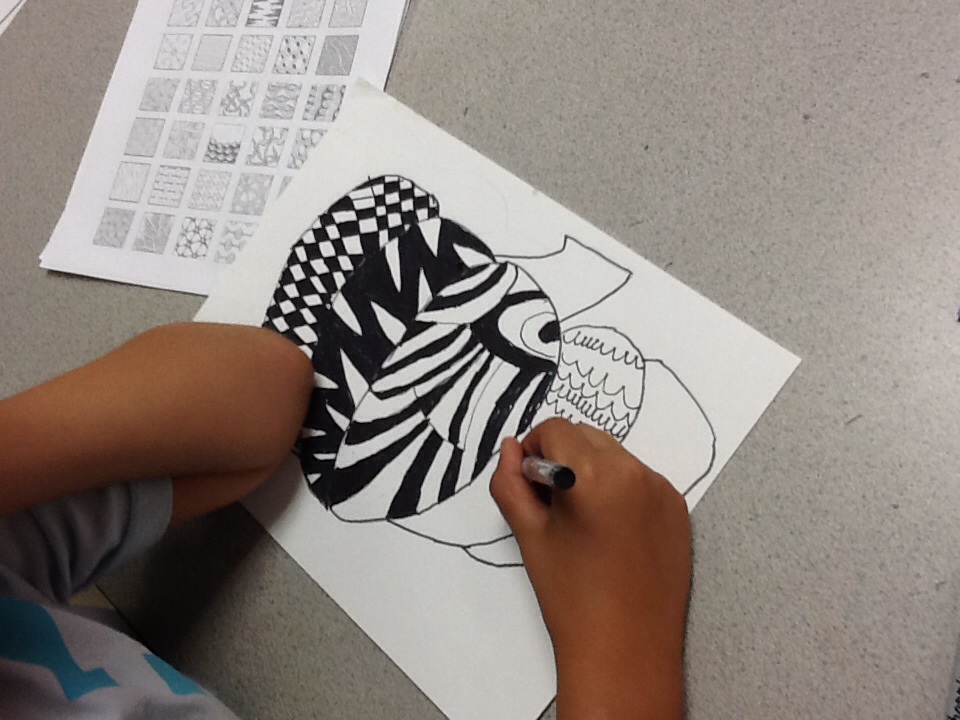
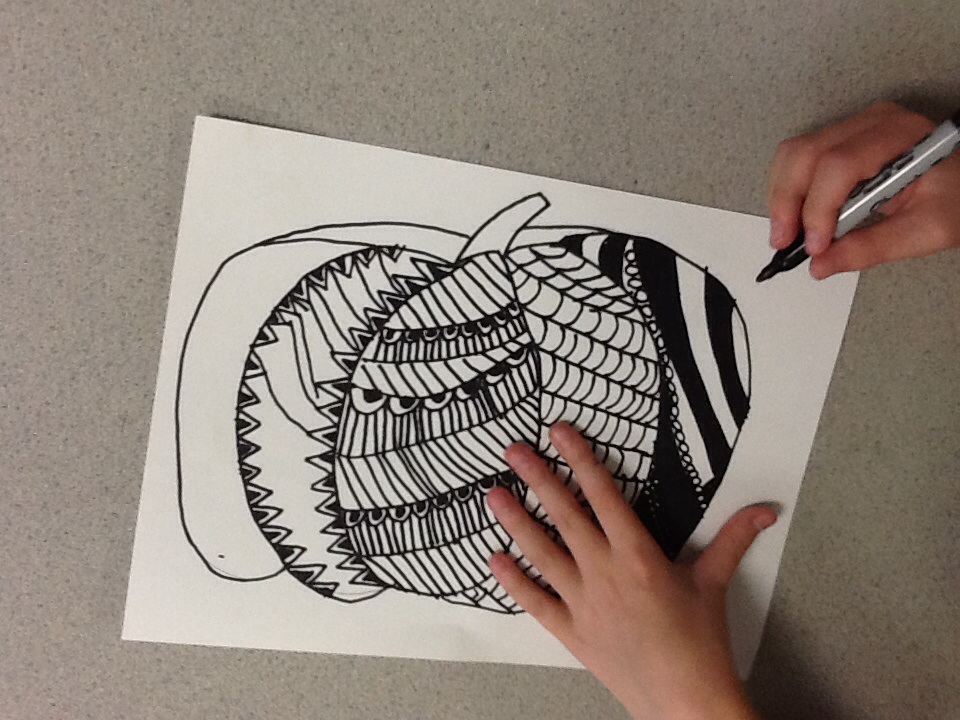
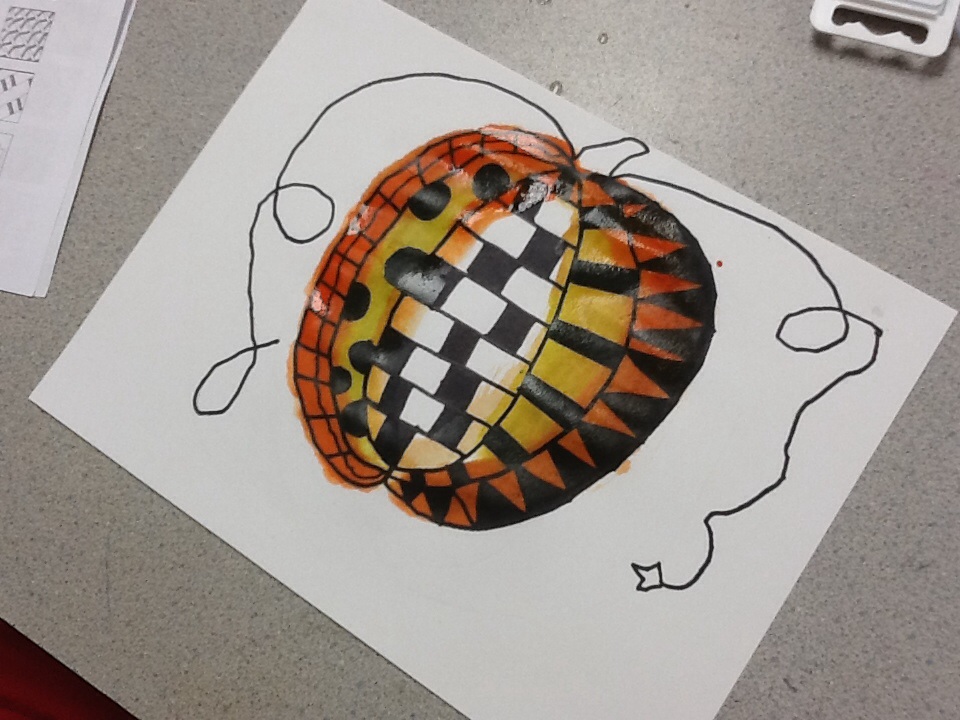
Each time the students come to class they have an opportunity to earn 3 Classroom Points, one for using the appropriate volume during class, one for following directions, and one for staying on task to meet classroom goals for the day. These points are earned as a class. Students also have an opportunity to earn individual points. For the month of September we focused on the clean-up time routine. To earn individual Dojo points, students had to demonstrate expected behavior during clean-up time. In October we are switching the focus to on task and focused work time. Students need to demonstrate focus on their art making during class time to receive individual points this month. The individual points earned will be added to the class total. At the end of each class we add up the points and post them on a chart at the back of my room. At the end of the month we see which class has earned the most Dojo points. There will be a winning class at each grade level. The winning class will get to keep the Dojo Trophy in their homeroom for the following month and the competition starts again. Individual students with high point totals in their class will also be awarded a small prize. The students really enjoy this management system and it gets very competitive towards the end of the month as they strive to achieve all their class points and more to come out on top. I am very proud of their drive to meet expectations. We are having fun with fall in the art room. The fourth graders are drawing pumpkins and filling them with a variety of complex patterns. We began by drawing our pumpkins on 9"x12" drawing paper and then tracing them with a black Sharpie. Next we discussed how we can turn simple patterns into more complex designs by adding 1 or 2 elements to them. For example, in the photo below and on the left, the student started with repeated wavy lines (a simple pattern), then drew circles on top of the lines & chose to color in some areas black and leave other areas white. Adding these elements turned the simple line pattern into a complex pattern.
We worked with one of my favorite materials, black Sharpies. Sharpies create such nice lines and the ink really saturates the paper, making the contrast of black and white visually appealing.
To add a pop of color we painted on top of our finished designs with watercolor paints. Similar to my 1st grade pumpkin project, I taught the fourth graders how to add dimension to their pumpkin by outlining each section of the pumpkin with orange and then adding yellow to the center of each section, blending the two colors together with the brush where they touch. The black ink will not bleed, because Sharpie markers have permanent ink. 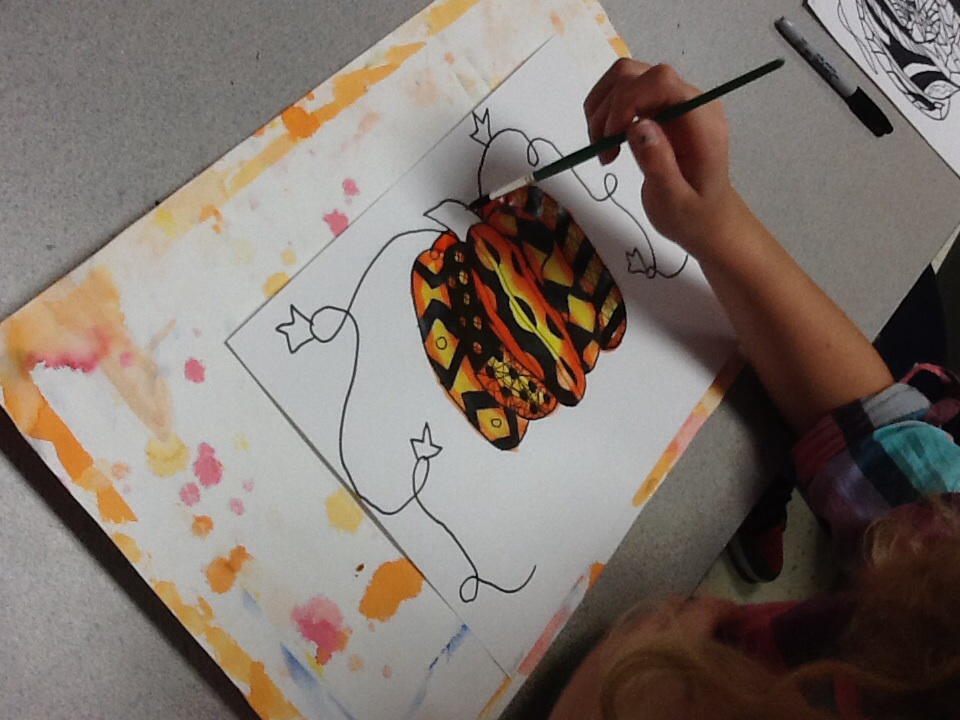
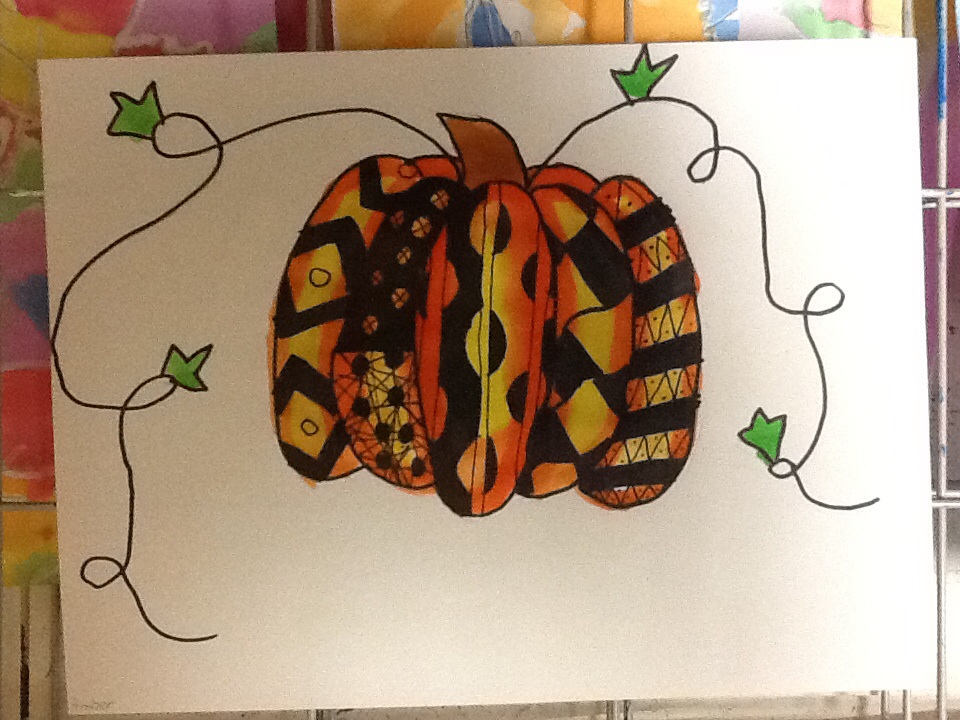
I thought I would like these pumpkins just black and white, but the color really has a striking effect!
|
Grande Park
|


 RSS Feed
